Open MiniGUI principles
marnix kok

As I was rummaging through ye ol' bin of things I made, I found some articles describing how to use the tiny little OpenGL GUI library I had created. If you're interested in trying to use the library, it's a good (yet incomplete) point to start at.
If you've ever written an application with the requirement that the user should be able to use it through a simple graphical user interface (GUI) you'll probably have one favourite toolkit that springs to mind. For me, this is the Java Swing toolkit. I'm able to get things done quickly in an environment that helps me in any way possible. This is a great choice if you need cross-platformness and the client doesn't really care whether the interface is dark gray while the rest of the interface is a peaceful yellow.
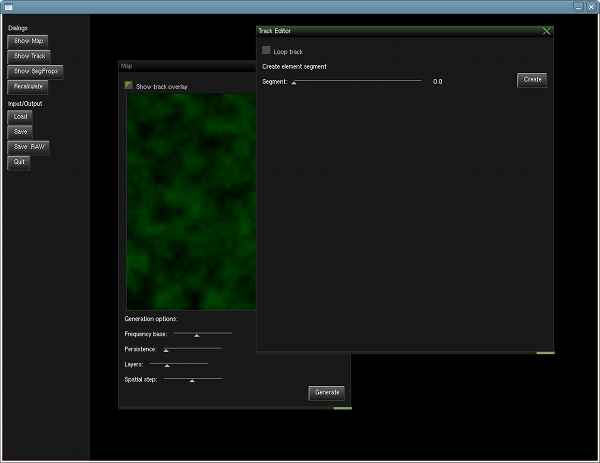
So recently I found myself thinking about the tooling of my application. What type of simple to use tools would I need to be able to generate content for my game, and how would I go about writing these tools. Would I use Ruby or Python for rapid development? Or would it be better to keep the tools inside C++ so I could reuse pieces of code that load and display the generated content. I decided to test both options.
First of all I created a simple application using Ruby and the Shoes mini GUI toolkit: http://code.whytheluckystiff.net/shoes/ -- which in my opinion is one of the most refreshing way to look at simple GUIs. Unfortunately, for what I wanted to accomplish with my little application was, at this point in the Shoes development cycle, somewhat too much.
As I'm not a great fan of the Qt and Gtk bindings for Python/Ruby (I've used them in the past) I decided to take a look at GUI toolkits in C++ once more.As I suspected most of the toolkits that were available for my platform (GNU/Linux) could do too much (which always shows in code), or were a hassle to code with (gtkmm). Influenced by the lovely simplicity of coding for the Shoes library I then decided to create my own toolkit called which is now known to me as MG (minigui).
This blog started later than my development of this library, so in the coming posts I will have to update you on how it all works. Perhaps I can make a small tutorial out of them in the end. To start you off, here are the requirements for the final product:
Minimal number of controls. This toolkit will support only a minimal number of controls, this means we can keep the code small, clean and simple.
Provides a rich set of mouse and keyboard events.
Layout Manager
As you could have read in the previous blog entry there are a number of requirements I want the minigui toolkit library to adhere to. This article will discuss the implementation of the first two requirements:
WYCIWYG: What you code is what you get.
Layout of components should be managed by layout managers.
WYCIWYG
What you code is what you get. In many GUI toolkits, you have to either create the interfaces you want to use through a labourous coding process or use some sort of interface designer that has been designed specifically for the toolkit (qt-designer, glade). This concept brings the developer an additional separation between the interface design and how the developer interacts with it which can hinder fast adaptions in the interface.
You see, I'm not very interested in what users (of the application) think of my interface. I don't care whether the buttons glow, or whether there are a hundred ways for me to visualise one thing. I am only interested in providing myself with a simple set of components, that click together easily, that allow for easy prototyping of powerful tools with only a small subset of the components that one "expect" to be inside a toolkit.
To this end, I've set a goal for this project. I want the syntax (in code) of the specification of a piece of interface to resemble the actual outcode a great deal. What You Code Is What You Get.
Part of the approach to creating a WYCIWYG environment is the introduction of layout managers. If you are familiar with how Swing lays-out its components, or perhaps you've read up on the Shoes project (http://code.whytheluckystiff.net/shoes/) you will understand what these manager do.
A layout manager is a manager associated with a container within a graphical user interface. When requested, this manager will determine and assign the positions of the components inside the container. The layout of the components is determined by the behaviour of the layout manager. Each component is able to specify its preferred minimal size (width and height) and can notify the layout manager about its desire to grow horizontally, vertically or in both directions.
At the moment only two layout managers have been implemented. A stack layout manager, and a flow layout manager.
The stack will use the components inside the container, and stack them on top of eachother. Much like a librarian would tidy a stack of books from the ground up. Depending on the information inside the components, the components will be stretched horizontally/vertically.
The flow layout manager performs the same type of task, but horizontally -- the librarian just uses a shelve to store the books.
Show me the Code
So, combining the desire to get what we code, and let the components be positioned by layout managers, we get the following code for a very simple interface that just contains two buttons and a text label. The commands that are used to build the containers to which stacks and flows are associated will be covered in a later entry post.
mg::Button *btQuit;
// stack the components together
stack();
// create components next to eachother
flow();
label("Hello world!");
button("My button");
end();
btQuit = button("Quit");
end();
// setup the layout properties of the "Quit" button to grow horizontally
btQuit->grow(Horizontal);
As you can see, the tree-like structure inherent to any user interface is clearly visible in the example above. A stack or flow container is ended by invoking the end() function. Provided the amount of controls are kept to a bare minimum, creating user interfaces will be a snap.
This article briefly touches on event management in the MG (minigui) library. As you can imagine, whenever you are writing a user interface, you put in controls. Some of these controls need to do something when a certain event occurs on them. For example, a button that gets clicked should respond by calling all the registered callback handlers for the "Click" event.
The MG library contains a number of events that are available for every component and container visible on the screen. These events are subdivided into Keyboard and Mouse events, the CallbackSkeleton class which contains all events basic descriptions looks like this:
class CallbackSkeleton
{
public:
virtual ~CallbackSkeleton();
// mouse event handlers
virtual void mouseClicked(Component *comp) {}
virtual void mouseDoubleClicked(Component *comp) {}
virtual void mousePressed(Component *comp, MouseEvent const &event) {}
virtual void mouseReleased(Component *comp, MouseEvent const &event) {}
virtual void mouseMoved(Component *comp, MouseEvent const &event) {}
virtual void mouseIn(Component *comp, MouseEvent const &event) {}
virtual void mouseOut(Component *comp, MouseEvent const &event) {}
// keyboard event handlers
virtual void keyPressed(Component *comp, KeyEvent const &event) {}
virtual void keyReleased(Component *comp, KeyEvent const &event) {}
};
A proper implementation of the CallbackSkeleton class needs to be associated with a Component through the callbackInstance(CallbackSkeleton *) method.
As you can see there are only a few keyboard events, while most of the mouse-related JavaScript events are present, including mouseIn and mouseOut. This gives us a great way to implement animations when, for example, the mousecursor enters a component. If we cared enough, we could implement a glow of sorts, or a simple highlight.
I think the design of my event system might be somewhat unorthodox and causes me to implement a different event model for any data related events. I haven't actually implemented this yet, but I've been thinking a great deal about it recently. Perhaps material for a later post. Anyway, implementing it the way as I explain here will allow the system to function as desired for the most basic events, which is what I am aiming for.
So, what happens whenever a certain event occurs? First of all you need to know that events occur from a SDL event loop. This means that we are able to intercept many basic events, such as mouse motion, keyboard presses and releases and clicking of mousebuttons. The more complex events defined in the CallbackSkeleton class are implemented through some extra work on my part.
Every event handler is associated with a top-element, for example a Window or a DesktopManager component (not implemented yet). Every Component contains a findAt method which helps determine the most inner component at position (x, y) of the current mouse cursor -- in case of keyboard events the current input focus component is used.
Once the most inner component is found, a vector of CallbackSkeleton pointers is filled with entries of handlers that are associated with the most inner component and that of its parents. Depending on the event that has occured a method from the CallbackSkeleton class is invoked for every entry in that vector.
Using events in a Window
To make the code easier to read a templated implementation of the CallbackSkeleton class has been created, mg::Callbacks. This class defines all different kind of class-member function pointer types, with the class being T, for example:
typedef void (T::*OnDoubleClickEvent)(Component *);
A typical use of this kind of class in your code would be as follows. In the class definition you would use multiple inheritance to include the templated callback manager:
class MyWindow :
public mg::Window, /* Window container */
private mg::Builder, /* flow, stack, button methods */
public mg::Callbacks /* callback methods for MyWindow */
{
mg::Button *d_quit;
public:
/* only going to show events here */
void quit(Component *comp);
private:
void setup();
};
/**
* Setup inherited classes and data-members
*/
inline MyWindow::MyWindow()
:
mg::Window("Control Test"),
mg::Builder(this),
mg::Callbacks(this),
{
setup();
}
It introduces a number of local members such as the "onClick" and "onMouseIn" methods to the class scope. They help the developer link a component with a class-member for a number of events.
So, to continue with some more code, let's use the interface we built in my last post:
void MyWindow::setup()
{
// stack the components together
stack();
// create components next to eachother
flow();
label("Hello world!");
button("My button");
end();
d_quit = button("Quit");
end();
// add handlers
onClick(d_quit, &MyWindow::quit);
}
Isn't that just the easiest thing you've ever seen?!
Data linking variables and components
In one of the previous posts I have expressed my desire to implement a construct in the minigui (MG) library that gives the developer an opportunity to link certain datatypes to components. An example of this (one I have implemented) is the slider component. Using a DataLink a local variable is updated every time the user of the interface moves the slider up or down. Another useful example would be a color structure that is updated every time a point in a color circle is clicked.
As with all the other elements in MG the semantics for binding information to local variables should be very simple. I have managed to break it down to this, retaining all type-safety through implementation of a template:
dataLink(localVariable, mgComponent);
or in our example:
float value;
Slider *sliderInstance = slider(0, 100, 0);
// link information to component
dataLink(value, sliderInstance);
At the base of this implementation lies the Observer/Observable design pattern. In short this pattern allows subscriptions to notifications of events within certain objects. The events we are waiting for are changes in the data of a GUI component. Subscribers are derivatives of the Observer class. When a notification is delivered the update method in each subscribed Observer is invoked.
Each component that provides a form of data binding will have to derive from the Observable class. The observers that register to these components are a variant of the DataLink class.
The DataLink class is a templated class that takes two parameters. The first one is the DataType it is listening for, "float" in our case; secondly the Class to which the information is bound is specified as well. The example uses DataLink<float, mg::Slider>.
The dataLink function in the Builder class creates a DataLink class and adds it to the instance of the second parameter (sliderInstance). Thankfully C++ is able to infer template typenames by analyzing the parameter types.
When a change in value occurs and the registered observers are invoked, the DataLink::update method will call the Class::getData(DataType &) method. This method should change the values of the reference to the correct value. This is how this works!
Data linking is first and foremost intended for linking simple variables/structs to a component to allow a render method to immediately change according to any GUI changes. However, it is also possible to link classes to datatypes, as long as there is a getData method that supports this class.
Think of all the possibilities!